
Shower Installation DIY in Langley
Click Here to Call 778-800-2732
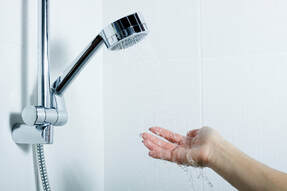
For people who like it more comfortable, a shower system instead of the conventional shower head can make sense. Shower systems are available with and without fittings. If you want to save yourself installing the system, a shower panel can be a worthwhile alternative. Otherwise, care should be taken when mounting to drill not in the tiles , but in the joints. What kind of tools do you need to install a shower? For the installation of a shower you need next to work gloves and goggles still some tools. For the measurement you need a pencil, spirit level and a yardstick. For drilling the holes you should have a cordless screwdriver at hand, because drilling with a cable-connected drill in the shower can be very tedious. You also need a drill with 8 mm masonry drill and a hand saw. For grouting a silicone syringe is used. If you have all the tools together, the assembly can start. The installation of a shower After unpacking, especially the glass walls should be checked for damage - scratched glasses can later be annoying and difficult to replace. Especially the corners are endangered here. After the fixed side of the wall and the door side have been installed, the laying of the tiles can begin. The drill must not move during this process. It is much easier to drill accurately by sticking a piece of crepe paper on the tile and marking the hole on it. When drilling you should only after you are in the tile, continue with blow or pneumatic. Otherwise you run the risk of the tiles shattering or simply leaking. Mount yourself or call a specialist? The question of whether to call for the installation of the shower, a professional, depends mainly on their own craftsmanship and the type of shower. For example, if you want to install a conventional corner shower, that is relatively easy. Because with these showers usually only a few steps are needed. What about other showers? Especially for the floor-level shower only specialists should go to work. Because with this type of shower cubicles the risk factor wetness is particularly high. If you are not sure if you should get an expert or not, you should always decide in case of doubt for the specialist. Because only here you have the relatively certainty that the shower works smoothly - even after months and years. Cleaning and maintenance of walk-in showers If you do not rely on an elevated shower, but choose a ground-floor version, you should be aware of the cleaning and maintenance. Because the tile joints must be cleaned at intervals - otherwise it can lead to mold and the like. In joints, you also have the risk that moisture permeates after some time. They should also be checked for functionality at longer intervals. These are comparatively small things, but over years the cleaning and inspection of the seal is essential. Mold on the shower walls: a health hazard Not only do they look ugly, they are also dangerous if they get to the mucous membranes of humans. It's not enough to just scrap them off the wall to remove them. With superficial mildew you only need scouring cream, which is mixed with vinegar and applied to the moldy surfaces. If it is deeper in the walls and joints adhering mold, you should put on chlorine cleaner to remove the mold. For silicone joints you should remove the filling completely to get rid of the mold once and for all. Because if you remove it only on the surface, it comes through the deeper spores after a few months again. After a few days of dry after chlorine cleaning, you can grout the tiles again with silicone. Prevention of mold In order not to see the annoying appearance on the shower wall, you should pay attention to a few things after showering. Most importantly, the shower is well ventilated. In particular, moist air should not stand in any way, the combination of heat and moisture is optimal for the spread of a mold culture. In addition, you should simply try to avoid, to hit the shower wall directly with water jets. Lime residues in the shower - How to remove them quickly and efficiently Although lime is harmless, lime deposits on the shower curtain and head are really not very nice. For the shower fitting you can simply use citric acid and vinegar. Simply wipe with a cloth of citric acid and a little vinegar to remove limescale. For more stubborn lime, simply leave the citric acid-vinegar mixture to work for about 30 minutes to thoroughly clean the fitting. However, you should be more careful when cleaning limescale with joints and tiles. The reason is that they tend to become slightly porous in high-acid budget funds. Therefore, it is best to use a mixture of soda and water here. In a ratio of 1: 3 soda and water you can work on the joints and free them from any limescale, without simultaneously attacking the tiles and silicone joints. If you can not get anywhere, which is often the case with larger niche showers, for example , you can easily clean all niches and gaps with a toothbrush with soda-water mixture. Preventing lime and dirt residues in the shower To keep the shower free of limestone, you can just dry it off immediately after showering. This can be perceived as annoying, but is a matter of habituation. The best way to clean the fittings and shower head with a towel. For the shower wall you simply take a puller, with which you drive over the surface a few times. But what about the shower curtain? This one simply washes once a month in the washing machine , already done here the lime problem practically all by itself. Compaction of the tiles in the shower cubicle: long-term and safe Especially shower cubicles older generations often have high quality tiles, but the grouting even at the best construction ever begins to be porous. To renew the leaking joints, the tiles should be removed and grouted. However, the shower is a place where moisture can easily penetrate into spaces. Therefore, one should set here on specially adapted to wet rooms materials. It should be set to a permanently elastic seal. In addition, the grout should be waterproof. However, what is even more relevant is the insulation of the joint. This is based on tile adhesive. Tip: Bituminous rubber as a substrate under the joint compound makes the gasket even more resistant and impermeable to water. Conclusion The topic of showering may seem self-explanatory, but in fact it requires a lot of knowledge in order to avoid mistakes and to achieve the greatest possible health and personal hygiene. This starts with the proper use of towels and sponges, but also applies to the proper sealing and cleaning of the shower cubicle of lime, dirt and mold. Do not be shy: even installing a shower is easier than you think. Of course, good planning is essential. These include, for example, gloves, goggles and tools such as a cordless screwdriver or a silicone syringe. Then even people who are not from the drawer can install a corner shower. A helping hand is definitely an advantage. But if you have manual skills, you should get the installation done without major problems. However, this applies as already mentioned, only for showers, which are attached to corners. However, if it is the one-floor designed showers, only professionals should be on the run, or at least help the team with help and advice. The reason is above all the wetness and thus a possible risk from severe mold growth. 
|
|